As a follow up to my Blog "Thinking Aloud: About Water," (click here) I wanted to share how quickly the tomatoes camouflaged the drip-system-milk-jugs that I placed in the tomato beds. My intent was both to save water and supply essential food directly to the tomato plants, and not everything else within run-off range. As you can see these tomatoes "Juliet" a Roma variety are heavy with fruit and looking very healthy. I grew these from seeds.
 |
| Roma Tomatoes - Bring On The Sauce! |
I am currently reading an awesome book, chock-o-block with great ideas, gardening tips and with loads of color photos on every page. Very well put together. I enjoy his style of writing too. I picked this up from Amazon.com. It is only a week old and already slightly "dog-eared."
 |
| A Must Read |
The main theme of this book is Container Gardening. I do grow many of my tomatoes in the ground (as evidenced by the Roma tomatoes), but I also grow a lot of peppers, carrots, radishes, spinach, lettuces, potatoes and soon cantaloupes, in containers. The main reason I grow these veggies in containers is so I can move them to the sunniest spot in the garden, as the year progresses. But growing veggies in containers in Florida, and right now, during our "dry' season, means watering everything every day. There has to be a better way. "The Vegetable Gardener's Container Bible" has an interesting solution I have just experimented with and wanted to share with you. It's basically a self watering system, which is heads and shoulders above my primitive milk jug idea.
First of all take two large buckets. The author recommends feed buckets, but I just used what I had to hand.
 |
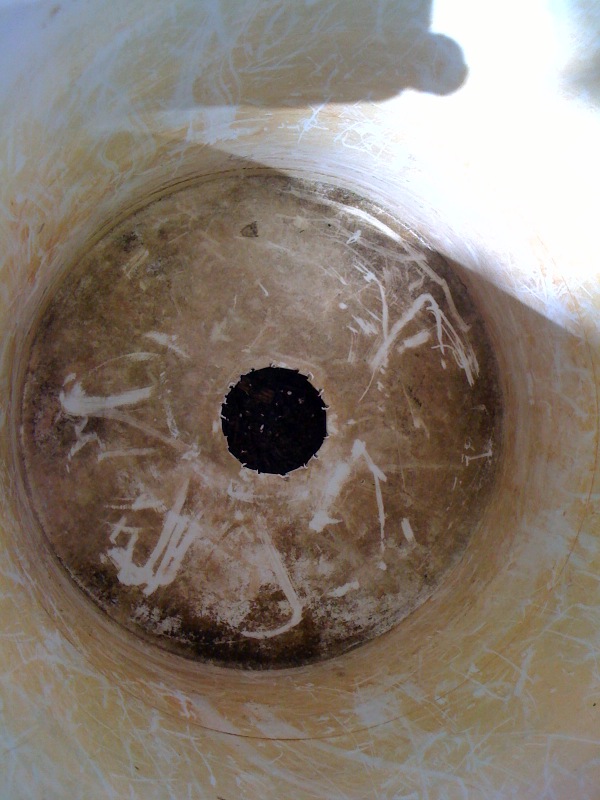
Drill circle of holes in bottom of bucket
|
Using a drill (you will need one), make a circle of drill holes in the bottom of one of the buckets and then by using a box cutter, carve out the drill-dot-circle, until the hole is formed. Now put the bucket-with-a-hole into the other bucket and mark with permanent marker (see left) where the bottom of that bucket sits. Just below that line, drill out another line of holes and cut a rectangle/square shape - large enough to allow a nozzle spray from your hose.
Now you need to make a wicking system.
I just used a sour cream container that I drilled holes into. The two buckets need to sit together snugly, one inside the other.....so you might need to trim the wicking container to make that happen.
Then I positioned the container into the bottom bucket (the one with the rectangle shape), and used a little bit of silicone to stick it to the bottom. Fill container with potting soil.
 |
| Sour Cream Container |
 |
| Position container on bottom |
 |
| Potting Soil in Wick |
 |
| Top bucket view down to Wick |
You guys still with me? OK then.
Now put the top bucket (the one with the circular hole cut out) and place it on top of the "wick."
Fill the top bucket with potting soil and plant. My container has a Tabasco Pepper along with radishes in a circle. The radishes will be ready in 22 days.
Water your bucket from the hole in the bottom. The potting soil "Wick" will take the water up into the potting soil. I plugged my nozzle hole with paper towel because I don't want to encourage the mosquitoes to breed in that nice, dark, standing water reservoir. I will get back with a progress report on how this pans out.
 |
| Finished Product |


I've heard of that book and wondered if it would be good. I love the idea for this wicking system, as you are right about having to water daily this time of year. I look forward to hearing your results. Please keep us posted.
ReplyDeleteI like it! Very cunning. This would be a good way of providing water for potted plants while you are way on holiday, even in areas of less extremes of climate than yours.
ReplyDelete